

In the event that you have to need to access an Asus router and have an issue with its configuration, this guide will help you with ASUS Router login. In this article, we will explain to you the most proficient way of logging in to the Asus Router, configuring it, and every other thing that you ought to know.
The sleek RT-AC 1900 highlights a 2.4 GHz and 5 GHz bands for an unparalleled simultaneous remote HD streaming; SMB server, UPnP AV server, and FTP server for every minute of every day; an ability to deal with 300,000 sessions simultaneously; and the ASUS Green Network Technology, which saves power up to 70%.
Constituents of the ASUS Router
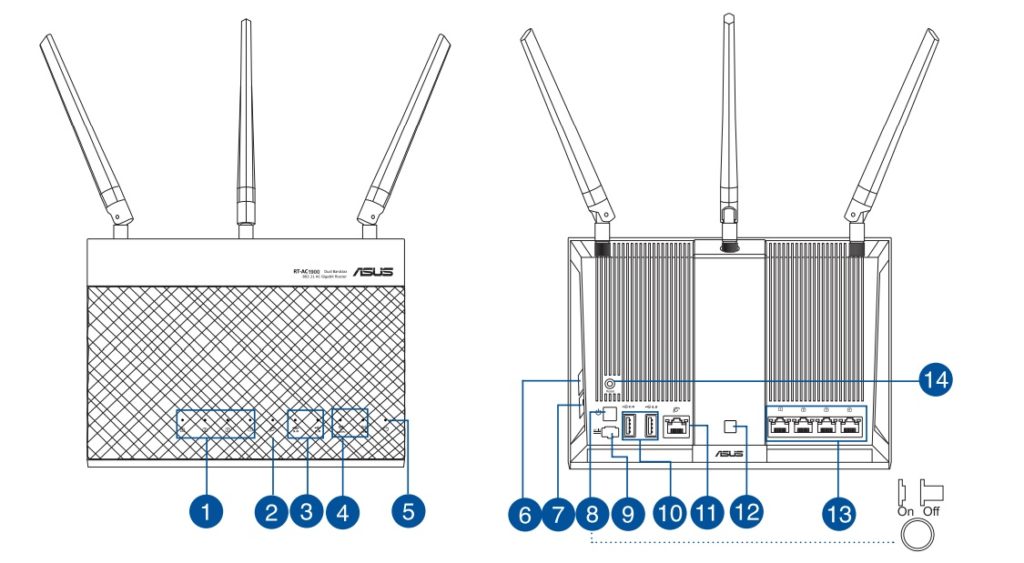
- LAN 1 – 4 LED
- Off: No power or no physical association.
- On: Has physical association with a neighborhood (LAN).
- WAN (Internet) LED
- Off: No power or no physical association.
- On: Has physical association with a wide region arrange (WAN).
- USB 3.0/2.0 LED
- Off: No power or no physical association.
- On: Has physical association with USB 3.0/2.0 gadgets.
- 2.4GHz LED/5GHz LED
- Off: No 2.4GHz or 5GHz sign.
- On: Wireless framework is prepared.
- Blazing: Transmitting or getting information by means of remote association.
- Power LED
- Off: No power.
- On: The device is prepared.
- Blazing moderate: Rescue mode
- Blazing snappy: WPS is preparing.
- WPS catch: This catch dispatches the WPS Wizard.
- WI-FI On/Off catch
- Press this catch to kill on/the Wi-Fi association.
- Power catch
- Press this catch to control on or off the framework.
- Power (DC-IN) port
- Supplement the packaged AC connector into this port and associate your switch to a power source.
- USB 3.0/2.0 ports
- Addition USB 3.0/2.0 gadgets, for example, USB hard plates or USB glimmer crashes into these ports.
- Addition your iPad’s USB link into one of these ports to charge your iPad.
- WAN (Internet) port
- Interface a system link into this port to build up the WAN association.
- Driven On/Off catch
- Press this catch to turn on/off the backdrop illumination LED on the board.
- LAN 1 – 4 ports: Interface system links into these ports to build up LAN association.
- Reset catch: This catch resets or reestablishes the framework to its processing plant default settings.
ASUS Router Login – How to login to Asus Router?
Your ASUS Wireless Router accompanies a natural web graphical UI (GUI) that enables you to effectively arrange its different includes through an internet browser, for example, Mozilla Firefox or Google Chrome.
To sign in to the web GUI:
1. On your internet browser, physically key in the remote switch’s default IP address: 192.168.1.1 or enter http://router.asus.com.
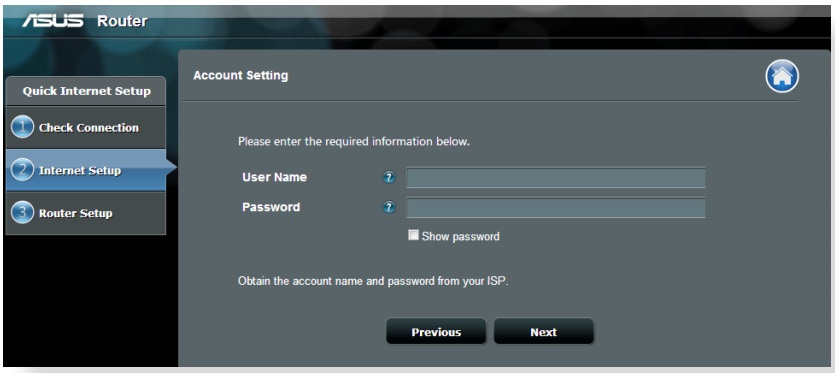
2. On the login page, key in the default client name (administrator) and secret phrase (administrator).
3. You would now be able to use the Web GUI to arrange different settings of your ASUS Wireless Router.
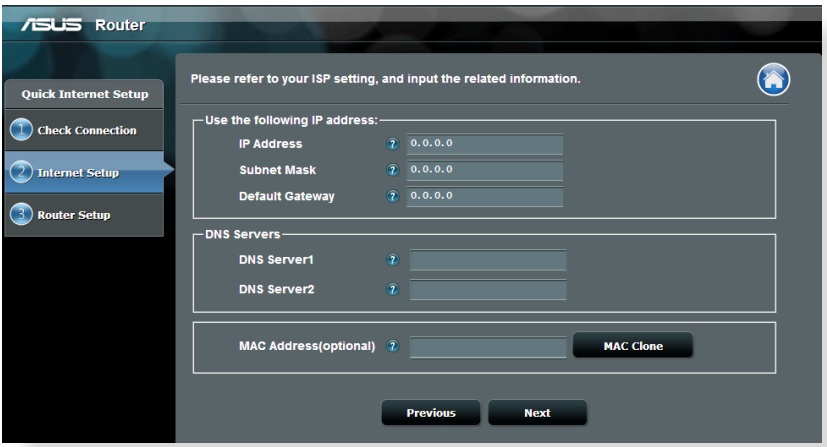
IP Configuration
- If you want your IP address to be dynamic, do the following –
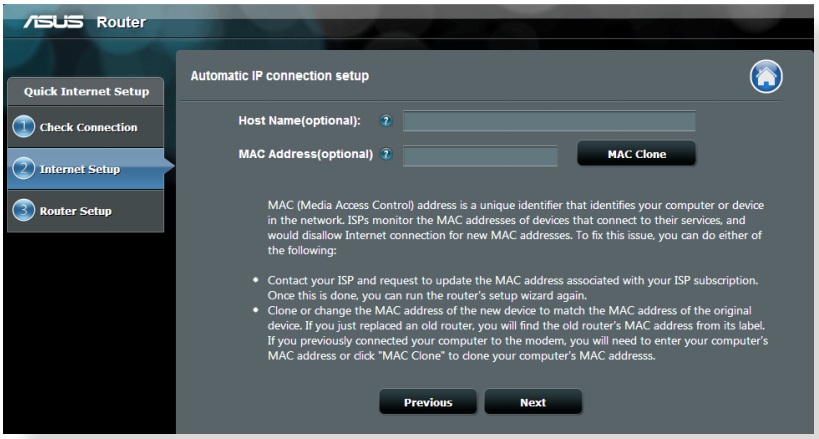
- If you want your IP address to be static, do the following –
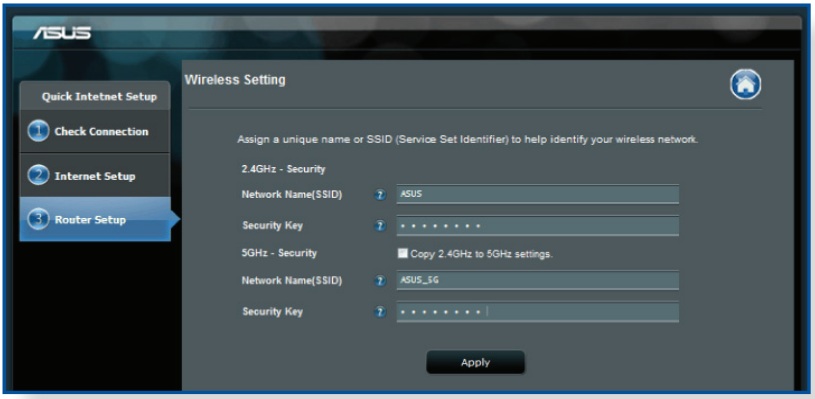
Set up your Wifi –
Name your Wi-fi SSID (name of your wi-fi network) and make a secure Security key (Password).
Configure your ASUS Router settings
System Map enables you to arrange your system’s security settings, deal with your system customers, and screen your USB gadget.
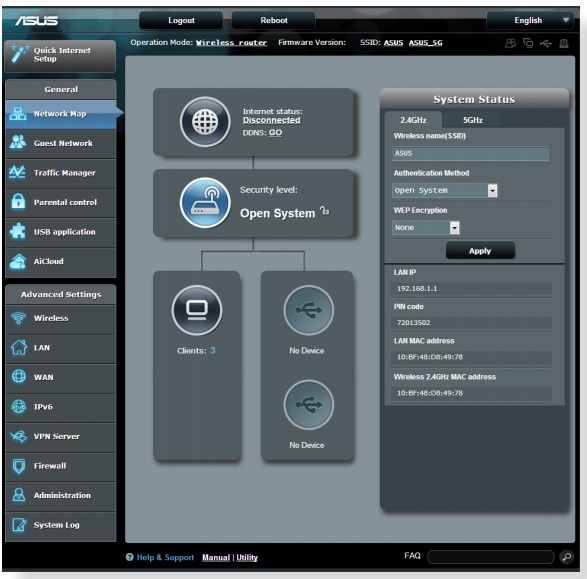
Asus Wireless Security settings
To set up the remote security settings:
1. From the route board, go to General > Network Map.
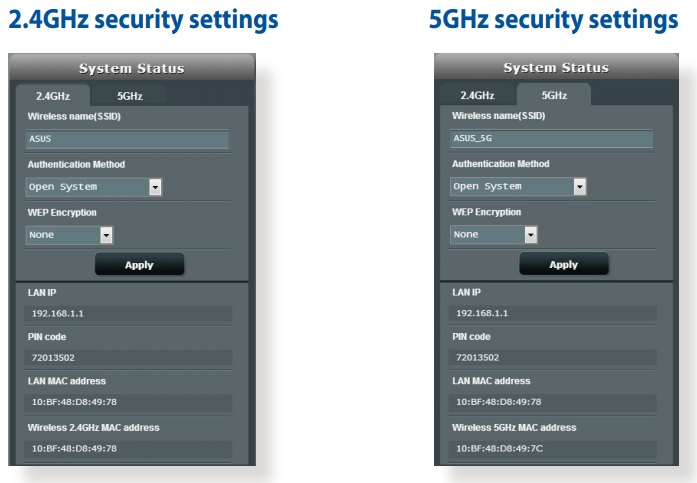
2. On the Network Map screen and under System status, you can arrange the remote security settings, for example, SSID, security level, and encryption settings.
3. On the Wireless name (SSID) field, key in an exceptional name for your remote system.
4. From the Security Level dropdown list, select the encryption technique for your remote system.
5. Key in your security passkey.
6. Snap Apply when done.
Guest network in ASUS Router setup
The Guest Network gives impermanent guests Internet availability by means of access to isolate SSIDs or systems without giving access to your private system.
1. From the route board, go to General > Guest Network.
2. On the Guest Network screen, select 2.4Ghz or 5Ghz recurrence band for the visitor organize that you need to make.
3. Snap Enable.
4. To design extra choices, click Modify.
5. Snap Yes on the Enable Guest Network screen.
6. Appoint a remote name for your transitory system on the Network Name (SSID) field.
7. Select an Authentication Method.
8. Select an Encryption strategy.
9. Determine the Access time or pick Limitless.
10. Select Disable or Enable on the Access Intranet option.
11. Whenever done, click Apply.
Traffic Manager on your ASUS Router
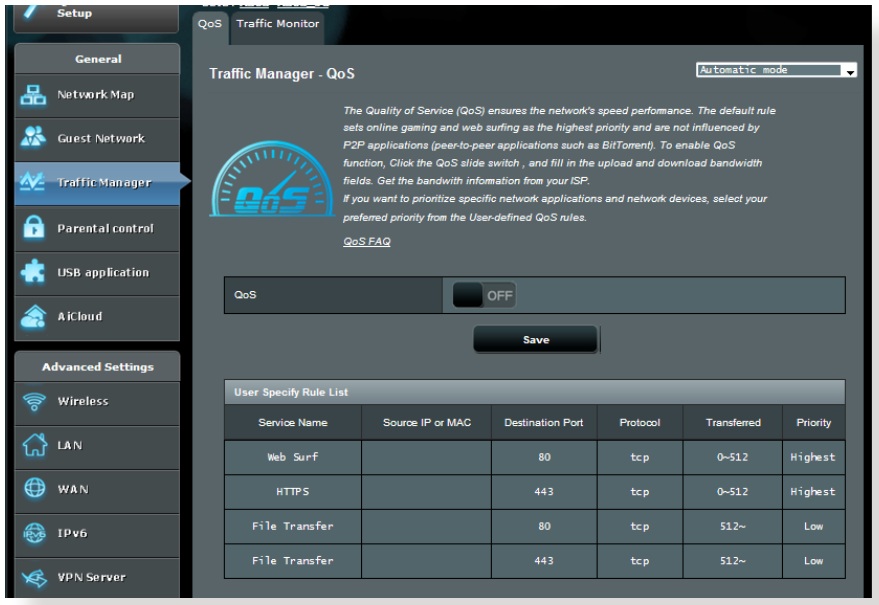
To set up data transfer capacity need:
1. From the route board, go to General > Traffic Manager > QoS tab.
2. Snap ON to empower QoS. Fill in the transfer and download transmission capacity fields.
3. Snap Save.
4. On the client characterized QoS guidelines page, there are four default online administration types – web surf, HTTPS and record moves.
Select your favoured administration, fill in the Source IP or MAC, Goal Port, Protocol, Transferred and Priority, at that point snap Apply. The data will be designed in the QoS screen.
5. On the User-characterized Priority page, you can organize the organized applications or gadgets into five levels from the user-defined QoS principles’ dropdown list. In light of need level, you can utilize the accompanying strategies to send information parcels:
• Change the request for upstream arrange parcels that are sent to the Internet.
• Under Upload Bandwidth table, set Minimum Reserved Data transfer capacity and Maximum Bandwidth Limit for numerous arrange applications with various need levels. The rates show the transfer transmission capacity rates that are accessible for indicated arrange applications.
6. Set the required parcel. To guarantee a smooth on the web gaming knowledge, you can set ACK, SYN, and ICMP as the
most required parcel.
• To fill in details about your IP address or your MAC ID, you can:
a) Enter a particular IP address, for example, “192.168.122.1”.
b) Enter IP addresses inside one subnet or inside a similar IP pool, for example, “192.168.123.*”, or “192.168.*.*”
c) Enter all IP addresses as “*.*.*.*” or leave the field clear.
d) The organization for the MAC address is six gatherings of two hexadecimal digits, isolated by colons (:), in transmission request (for eg. aa:bb:cc:11:22:33)
• For source or goal port range, you can either:
a) Enter a particular port, for example, “95”.
b) Enter ports inside a range, for example, “103:315”, “>100”, or “<65535”
Restore your ASUS Router to factory settings
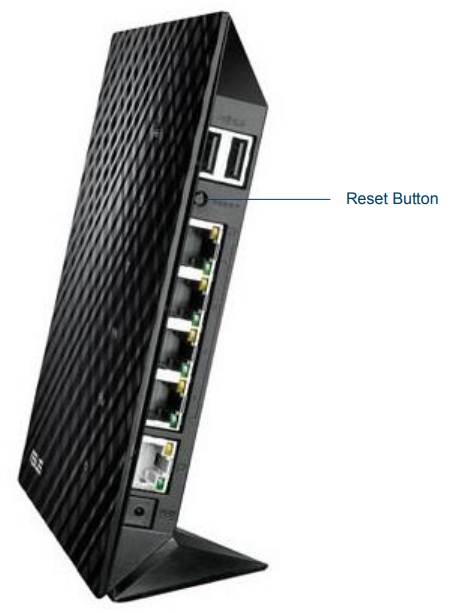
1. Affirm your TP-LINK switch is exchanged on.
2. Press and hold the [Reset] catch with a sharp object for 5 seconds, at that point discharge the [Reset] catch and hold up the switch to reboot to its processing plant default settings.
3. Default Setting of your ASUS Router would be:
Login Name – admin
Password – admin
IP Address – 192.168.1.1
SSID – ASUS
Conclusion: Way forward
Congratulations! In the event that you have calmly perused the article, you have obtained learned to set up and configure your Asus router. You can likewise change your secret key in the event that you figure somebody may abuse it.